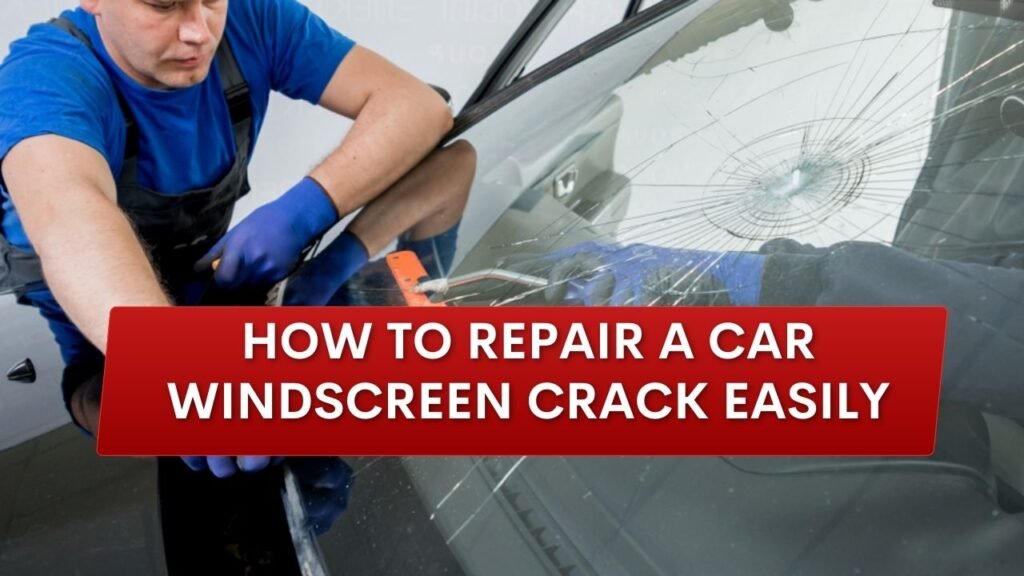
You were just driving along, enjoying your music, and suddenly, a tiny pebble launched by a truck leaves a jagged mark on your car windscreen. It feels like a blemish on your prized possession and a potential drain on your wallet.
The good news is that you do not have to panic or immediately book an expensive replacement. Knowing how to repair a car windscreen crack easily can save you hundreds of dollars and a lot of stress. In this guide, we will walk through everything from identifying the damage to sealing it like a pro.
Understanding the Problem
Before you go for a repair kit, you have to know what you are dealing with. A car windscreen is not just a piece of glass. It is a safety feature that is intended to give your car structural integrity. When it breaks, that integrity is compromised.
- Common Reasons Why Windscreens Develop Cracks:
Something sharp on the highway often starts a crack. A stone, maybe gravel – sometimes ice – slams into the windshield hard enough to split it. Then again, timing matters when junk tumbles off a flatbed up ahead.
- How Temperature Changes Affect Glass Integrity:
Glass contracts and expands. A tiny chip may spread over the entire surface of your car if you park it in direct sunlight and then turn on the air conditioning. For this reason, the secret to a successful do-it-yourself repair is to act fast
- .The Dangers of Driving with Unrepaired Damage:
A break in the glass weakens how strong the frame is. Should something go wrong on the road, that split might stop the windshield from holding up the top if the vehicle rolls. It could also mess with how fast the airbags come out when needed most. Beyond protection, sunlight bouncing off the line across the glass pulls your focus away. Seeing clearly down the street gets harder when bright reflections dance around the damage.
Repair a Car Windscreen Crack Easily Step by Step
Ready to get your hands dirty? Here’s how. Pay attention. Accuracy is what separates a sneaky fix from a sloppy smear on your glass.
Step 1: Inspecting and Assessing the Damage
A fingernail pressed into the split tells a story. Smooth within, gritty beyond – damage sits only on the surface shell. A close look through a small lens reveals trapped grit hiding deep. When debris shows up, clear it out before moving ahead.
Step 2: Cleaning the Crack Area Thoroughly
Start by wiping the glass near where it cracked using an alcohol wipe. Skip normal window spray – its ingredients might clash with the repair liquid. Wait until every bit feels completely dry. One speck of moisture stops the glue from sticking right.
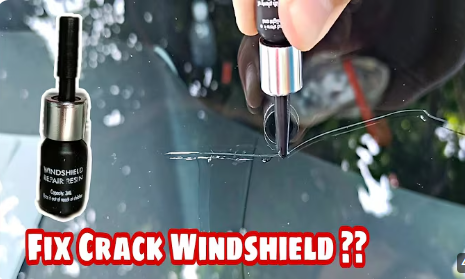
Step 3: Applying Repair Resin with Precision
Start by placing the bridge device right over the crack’s hollow section. Once positioned, twist the injection knob slowly so it pushes down hard onto the windshield surface. Watch how the clear fluid begins to flow into the damaged spot. Pushing air aside, the runny material moves in to take its place instead. As the gap becomes full, the broken area starts looking whole again.
Step 4: Curing the Resin Properly
After sealing the crack, remove the bridge tool, then place a curing strip over the area. Sunlight works best, so pull the vehicle into open light – or use a UV lamp instead. Without UV exposure, the resin stays soft. Hardening usually needs just 15 to 30 minutes under strong sunlight.
Step 5: Polishing for Crystal Clear Results
Start by peeling off the curing strip. There’s a firm blob of resin left behind now. Hold the razor upright – straight down like a wall – against that spot. Work it slowly so the high part comes off, even with the surface. Finish up with some polish made for glass to bring back clarity.
Identifying Car Windscreen Crack Types
Not all cracks are created equal. Some are easy to repair, while others are a cry for help. The shape of the damage will help you decide which resin and technique to use.
- Star Breaks and Their Unique Patterns
These appear to be a series of small cracks spreading out from a central location. These can be difficult to repair because, if you don’t fill in all of the “arms” of the star, the damage will continue to spread.
- Bullseye Cracks: Characteristics and Repair Difficulty
A bullseye is a circular impression with a dark ring around it. These are actually the easiest to repair because the “pocket” created by the impact allows the resin to flow in and fill the void completely.
- Edge Cracks: Why They Spread Quickly
If the crack begins within two inches of the edge of the glass, it becomes an edge crack. These are very dangerous because they are under the most pressure from the car’s frame. These cracks tend to move faster than the blink of an eye.
- Combination Cracks: Complex Repair Scenarios
Occasionally, you will see a bullseye with star legs radiating from it. These take time and skill, and the best DIY kit money can buy to make sure the resin gets into all the microscopic cracks.
- Essential Tools and Materials
You wouldn’t do surgery with a butter knife. To achieve a crystal-clear finish, you have to have the right tools. Most people choose to use a bridge-style repair kit because it enables better pressure control.
Complete DIY Repair Kit Checklist
- Bridge and Injector: This is what holds the resin over the crack.
- Repair Resin: This is the liquid plastic that fills the crack.
- Curing Strips: These are clear plastic strips that prevent air from entering the crack while the resin hardens.
- Razor Blade: This is what you use to remove excess hardened resin.
- Alcohol Prep Pad: This is what you use to clean the area.
Additional Tools for Professional Quality Results
If you want to go the extra mile, grab a hair dryer to warm the glass. This will help the resin flow better. A small vacuum or a can of compressed air is also good to blow the dust out of the crack before you start.
- Selecting High Quality Resin for Lasting Repairs
Cheap kits will use thin resin that will yellow with time. Start by checking if the kit says it uses UV-light to set the material. That kind of detail usually means better clarity after drying. Instead of running thin, go for thicker formulas – they hold their shape longer. Light exposure helps harden the substance fully. A solid bond lasts as long as the car itself.
- Professional vs DIY Repair
Home kits are just plain amazing, but they are not magic. There are times when the most prudent course of action is to realise that the project is simply too large for a home kit. a b c. When cracks stretch beyond six inches or reach the glass edge, get help from a professional car service. Should your car be new with tech like sensors or cameras built into the windshield, an expert must adjust the setup once work finishes.
Frequently Asked Questions
Q1: Can I fix a cracked windshield on my own, or should I hire a professional?
A small crack could be something you sort alone – find the repair pack at most auto stores. But if it runs longer than six inches, shows up dead centre on the windshield, or spreads like roots in different directions, leave it to a pro.
Q2: How long does it take to repair a car windscreen crack using DIY methods?
Most home fix kits need about half an hour to a full hour just for putting things together. After that, they have to sit and harden – this part can last anywhere from two hours to nearly a whole day. Heat and moisture levels in the air change how fast this happens.
Q3: Is it safe to drive with a cracked windscreen?
Windshield damage makes driving risky. That small break weakens the car’s frame over time. Visibility gets worse, particularly after dark or during rain. Pressure from speed pushes cracks outward. Cold mornings followed by warm sun stress the glass further. A sudden jolt might finish what started slowly. Broken glass fails when needed most.
Q4: What determines whether a windscreen can be repaired or needs complete replacement? A key role belongs to how big the break is, where exactly it sits, how deep, plus what kind of harm shows up. When a split stays under six inches, misses the driver’s main view, and affects just one layer, fixing often works out fine. If splits multiply, spread wide, or punch through both glass levels, swapping the whole pane becomes necessary instead